
Are you looking to spark your creativity? Sometimes, all you need is a simple project to get those imaginative juices flowing. Whether you’re a seasoned crafter or just starting out, these easy creative projects for adults can help you explore your artistic side. From home decor to personal accessories, there’s something here for everyone. Grab your supplies and let’s dive into some fun and engaging projects!
Key Takeaways
- These projects are perfect for all skill levels.
- You can use materials you likely have at home.
- Each project offers a unique way to express creativity.
- They can be completed in a weekend or less.
- Crafting can be a great way to relax and unwind.
1. DIY Pool Noodle Luminaries
Okay, so who knew pool noodles could be so versatile? I mean, besides, you know, keeping you afloat. This project is super fun and gives you some really cool, ambient lighting for your patio or even indoors. Plus, it’s a great way to use up those extra noodles you have lying around after summer!
Here’s the gist:
- Grab some pool noodles (duh!).
- Get your hands on some battery-operated LED lights – the fairy light kind work great.
- Some plastic wrap will also be needed.
- Finally, you’ll need scissors and plastic hair ties.
Basically, you’re creating a cozy little lantern. It’s way easier than it sounds, trust me. You can customize the colors and light patterns to match your vibe. I’m thinking a string of these would look amazing for a backyard party. You can trim a lighting strip to fit between two ends covered in contact paper.
I tried this last year, and it was a hit! The kids loved helping, and we ended up with the cutest, most unique outdoor lights on the block. Just be careful when cutting the pool noodles – safety first!
2. Fabric Covered Spring Vases
Got some plain vases lying around? Let’s give them a spring makeover! This project is super simple and a great way to use up fabric scraps. Seriously, it’s like giving your vases a whole new wardrobe. Plus, it’s a fun way to match your vases to your existing decor. I did this last year, and it was so much fun rummaging through my old fabrics.
Fabric-covered vases are a fantastic way to add a personal touch to your home.
Here’s a quick rundown of how you can make your own:
- Gather your supplies: vases, fabric scraps, scissors, and Mod Podge (or any craft glue).
- Cut the fabric to fit the vase. You can either wrap the entire vase or create smaller sections for a patchwork look.
- Apply Mod Podge to the vase and carefully adhere the fabric. Smooth out any wrinkles or bubbles.
- Let it dry completely, and then add another layer of Mod Podge to seal the fabric. This also gives it a nice, glossy finish.
- Once everything is dry, you’re ready to show off your DIY decor projects!
I found that using different textures of fabric really adds depth to the vases. Don’t be afraid to mix and match! You can also add embellishments like buttons or ribbons for extra flair. It’s all about making it your own.
3. Rope Wrapped Candleholder
Okay, so this one is super easy and adds a touch of rustic charm to any room. Plus, it’s a great way to use up any extra rope you might have lying around. I had some leftover from a macrame project (which, by the way, did NOT go as planned), and this was the perfect solution.
Here’s the lowdown:
- Grab a glass candleholder. Any size or shape works, really. I used an old mason jar because, well, I have a million of them.
- Get your rope. Jute rope works great, but any kind will do. Just make sure it’s thick enough to make a statement.
- Hot glue time! Start at the base of the candleholder and carefully wrap the rope around, securing it with hot glue as you go. Try to keep the rows nice and tight for a clean look.
- Keep wrapping until you reach the top. Cut the rope and glue the end down securely.
- Pop in a candle, and you’re done! Seriously, that’s it.
I love how this project instantly makes a space feel cozier. It’s also a fun way to add a nautical or bohemian vibe to your decor without spending a ton of money. Plus, it’s so simple that even I couldn’t mess it up (and that’s saying something!).
This DIY nautical candle holder is a great way to add a personal touch to your home decor. You can customize it with different colors of rope or even add some embellishments like beads or shells. Get creative and have fun with it!
4. Marbled Mugs with Nail Polish
Okay, this one is seriously fun and surprisingly easy. I remember trying this out last year, and it was such a blast! Plus, you probably already have most of the stuff you need lying around. It’s a great way to give those plain, boring mugs a total makeover. Let’s get started!
All you need is a mug, some nail polish, and a container of water.
Here’s a quick rundown:
- First, fill a container with room temperature water. Not too hot, not too cold – Goldilocks zone, people!
- Next, grab your nail polish colors. I like to use a few different ones that complement each other. Think blues and greens, or pinks and purples. Swirl them around a bit on the water’s surface.
- Then, dip your mug! Roll it around to pick up the polish. You might need to experiment a little to get the look you want.
- Finally, let it dry completely. And bam! You’ve got a custom marbled mug. Hand wash only, though, to keep your design looking fresh.
This is a super satisfying project because you see results almost instantly. Plus, it’s a great way to use up those old nail polishes you’ve been hoarding. Don’t be afraid to experiment with different colors and techniques to find your perfect marble look!
This is also a great way to explore different content ideas for your next creative project.
5. Vintage Buttons Necklace
Okay, so this one is seriously cool. I mean, who knew you could turn old buttons into something so stylish? I definitely didn’t, until I saw it. It’s like giving those forgotten treasures a whole new life, and honestly, it’s way easier than it looks. Plus, it’s a great way to use up all those random buttons you’ve been hoarding (or is that just me?).
Here’s the lowdown:
- Gather your vintage buttons. Raid your grandma’s sewing kit (with permission, of course!), hit up some thrift stores, or check out any local craft shops. The more variety, the better!
- Lay out your buttons in the order you want them to appear on the necklace. Play around with the arrangement until you find something you love.
- Thread a needle with some strong thread or embroidery floss. Carefully sew the buttons together, overlapping them slightly to create a layered effect. Make sure they’re securely attached.
- Once all the buttons are connected, attach a chain or ribbon to each end of the button strand. You can use jump rings or simply tie the chain directly to the buttons.
- Rock your new necklace! Seriously, get ready for compliments. People will be asking where you got it, and you can proudly say, "I made it myself!"
I tried this last weekend, and it was so much fun! Finding the buttons was like going on a treasure hunt. I ended up using a mix of old and new buttons, and it turned out even better than I expected. It’s a great conversation starter, and it adds a unique touch to any outfit. Plus, it’s a super affordable way to add some personality to your wardrobe. You can explore a variety of fun button crafts to get inspired.
Seriously, give it a try. You might just surprise yourself with what you can create!
6. Dream Catcher Craft
Okay, so dream catchers might seem a little woo-woo, but honestly, they’re super fun to make, and they add a cool, chill vibe to any room. Plus, it’s a great way to use up some of those random craft supplies you’ve got lying around. Let’s get started on this awesome project!
Here’s what you’ll need:
- A hoop (embroidery hoops work great!)
- Yarn or string (various colors and textures)
- Beads (any kind you like)
- Feathers (real or craft)
- Scissors
- Glue (optional)
Here’s how to make it:
- Wrap the hoop with yarn. Secure the end with a knot or a dab of glue.
- Create a web inside the hoop by weaving the yarn across, creating a star-like pattern. There are tons of tutorials online if you need a visual guide.
- Add beads to the web as you go. String them onto the yarn before you weave.
- Attach feathers to the bottom of the hoop with yarn or glue. Feel free to get creative with the arrangement.
I remember making these with my niece last summer, and it was such a blast. We spent the whole afternoon laughing and getting tangled in yarn. It’s not just about the finished product; it’s about the memories you make while doing it. Plus, it’s a great way to improve website design and make something beautiful together.
Seriously, don’t overthink it. Just have fun with it. You can make it as simple or as elaborate as you want. And who knows, maybe it’ll even catch some good dreams!
7. DIY Wooden Bangles
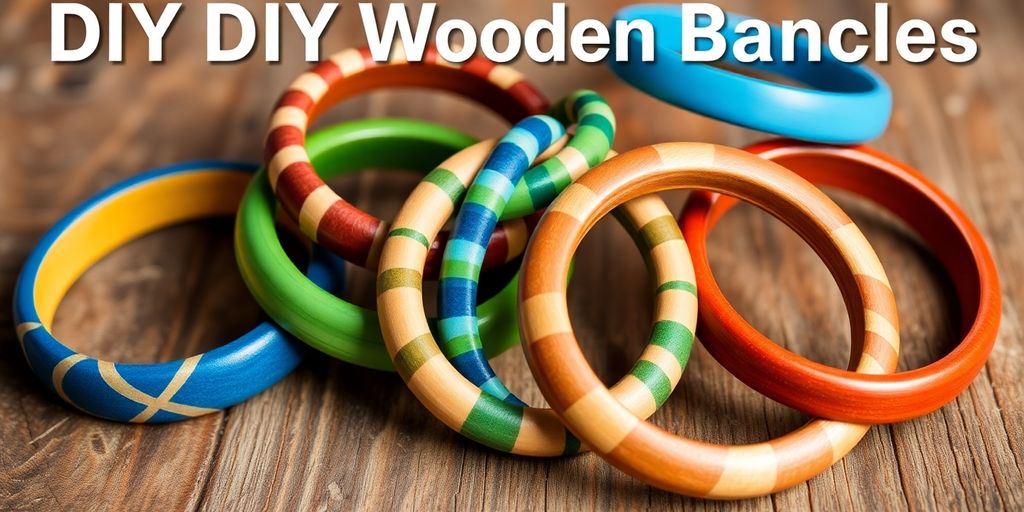
Okay, so you’ve got some plain wooden bangles lying around, right? Or maybe you’re thinking of picking some up. Either way, this project is super fun because you can totally customize them to match your style! It’s way easier than you think, and the results are so rewarding. Plus, it’s a great way to use up any scrap materials you have.
Here’s a basic idea of how you can approach this:
- Painting: Acrylic paints work wonders. You can go for solid colors, gradients, or even intricate designs.
- Decoupage: Cut out images from magazines, newspapers, or pretty paper and glue them onto the bangle. Seal with a varnish.
- Wrapping: Use yarn, embroidery floss, or even thin strips of fabric to wrap around the bangle. Get creative with colors and textures.
I remember when I first tried this, I was a bit intimidated. But honestly, it’s so forgiving! If you mess up, just paint over it or start wrapping again. Don’t be afraid to experiment and have fun with it. You might surprise yourself with what you create!
Don’t forget to seal your bangles with a clear varnish or sealant to protect your designs and make them last longer. And if you’re looking to grow your business, consider exploring some simple online marketing tools for businesses to promote your creations!
8. Sand Art Candles
Okay, so this one is super fun and a great way to use up any leftover craft supplies you might have lying around. Plus, the result is a really cool, personalized candle that makes a great gift (or just a nice addition to your own home decor!).
Basically, you’re going to layer colored sand in a glass container, then add a wick and wax. It’s way easier than it sounds, trust me. I’m not the craftiest person, and I managed to make some pretty awesome ones. Let’s get into it.
First, you’ll need a clear glass container. Think mason jars, old drinking glasses, or even those cute little succulent planters. Next, grab some colored sand. You can buy sand art kits or even color your own using regular sand and some powdered tempera paint. Just mix the sand and paint in a bag, shake it up, and let it dry. Easy peasy!
Here’s the fun part: layering the sand. You can go for a rainbow effect, create patterns, or just do whatever feels right. There’s no wrong way to do it! Once you’re happy with your layers, insert a candle wick into the center of the sand. Make sure it’s long enough to stick out above the top of the glass. Then, carefully pour melted wax around the wick. I like to use soy wax because it burns clean, but paraffin wax works too. Just be careful when melting the wax – low and slow is the way to go.
Let the wax cool completely before lighting your candle. And there you have it – a beautiful, unique sand art candle that you made yourself! It’s a great way to add a pop of color to any room and a fun project to do with friends or family.
Here’s a quick list of what you’ll need:
- Clear glass containers
- Colored sand
- Candle wicks
- Wax (soy or paraffin)
- Double boiler or microwave-safe bowl
9. Decoupaged Flower Vase
Okay, so you’ve got a plain flower vase, right? Maybe it’s glass, maybe ceramic – doesn’t matter. Let’s give it a total makeover with some decoupage! It’s way easier than it sounds, trust me.
First, gather your supplies. You’ll need your vase, some Mod Podge (or any decoupage glue), a brush, and some pretty paper. Think scrapbook paper, old book pages, even fabric scraps! Anything that catches your eye.
Here’s the fun part:
- Tear or cut your paper into small pieces. Don’t worry about being perfect; uneven edges add character.
- Apply a thin layer of Mod Podge to a small section of the vase.
- Stick a piece of paper onto the glue, then brush another layer of Mod Podge over the top. This seals it and makes it smooth.
- Repeat, overlapping the pieces slightly, until the whole vase is covered.
- Let it dry completely. Seriously, don’t rush this step, or you’ll end up with a sticky mess.
- Once it’s dry, add another coat of Mod Podge to seal everything in. This will also give it a nice, glossy finish.
I did this last year with some old maps, and it turned out so cool! It’s a great way to upcycle materials and create something totally unique. Plus, it’s super relaxing to just sit and glue paper for a while.
The best part is you can totally customize it to match your decor. Want something rustic? Use burlap or old sheet music. Going for a modern vibe? Try geometric patterns or metallic paper. The possibilities are endless! You can even use vellum stickers to add extra flair.
And that’s it! You’ve got a brand-new, totally unique flower vase that’s sure to brighten up any room.
10. Indoor Herb Garden
Okay, so you don’t have a backyard? No problem! An indoor herb garden is super doable and adds a little green to your space. Plus, fresh herbs at your fingertips? Yes, please!
Here’s the lowdown:
- Pick Your Herbs: Basil, mint, parsley, chives – go for what you use most. I’m a sucker for basil, so that’s always first on my list.
- Get the Right Pots: Make sure they have drainage holes. Nobody likes soggy roots.
- Good Soil is Key: Use a potting mix designed for herbs. It makes a difference, trust me.
- Sunlight, Sunlight, Sunlight: Herbs need a good amount of light, so a sunny windowsill is ideal. If you don’t have enough natural light, consider a grow light. I had to get one last winter, and it worked wonders.
I started my herb garden last spring, and it’s been such a game-changer. Fresh pesto whenever I want? Yes, please! It’s also surprisingly therapeutic to tend to them.
Don’t be afraid to experiment! See what works best for you and your space. You’ll be surprised how easy it is to have a thriving indoor herb garden right in your kitchen.
Wrapping It Up
So there you have it! Ten fun and easy projects to get those creative juices flowing. Whether you’re looking to unwind after a long day or just want to try something new, these ideas are perfect for sparking your imagination. Remember, it’s all about having fun and expressing yourself, so don’t stress about making everything perfect. Grab your supplies, get started, and enjoy the process. Who knows? You might just discover a hidden talent or a new favorite hobby along the way!
Frequently Asked Questions
What materials do I need for DIY Pool Noodle Luminaries?
You’ll need pool noodles, plastic wrap, LED tea lights, plastic hair ties, and scissors.
How can I decorate my vases with fabric?
You can wrap fabric around your vases and secure it to create beautiful fabric-covered spring vases.
What is the best way to create a marbled effect on mugs?
You can use nail polish to create a marbled design on your mugs by swirling different colors together.
How do I make a dream catcher?
To make a dream catcher, you need a hoop, string or yarn, and decorative items like feathers and beads.
What can I use to make a vintage buttons necklace?
You can use vintage buttons, a chain, hot glue, and thread to create a unique necklace.
How can I start an indoor herb garden?
You can start an indoor herb garden by using small pots, soil, and your favorite herb seeds or plants.